Spins Users Encryption Project How-To
This document will explain
how to transition a current Spins user from unencrypted telnet and FTP to
encrypted SSH and SFTP. The reason for doing this is that the current protocols
are insecure and need to be replaced by the more secure protocols. Most Spins
users use a product called AccuTerm97, which is really a telnet client with
the ability to display the symbion terminal graphics that Spins uses. AccuTerm
97 does not include the SSH protocol by default. Luckily there is a free add
on for AccuTerm 97 available at the AccuTerm FTP server that gives it the
capability to do SSH. Also Spins users currently use some form of FTP client
to retrieve documents from the Spins system. So they will need the SSH/SFTP
client available here to begin using SFTP instead. The university has a site
license for this client so no new license is required. The rest of this document
will explain step by step how to complete the transition.
Phase I
AccuTerm Upgrade
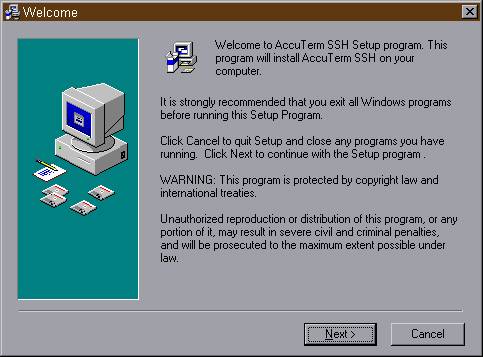
Step 1. Click the here to download the file atsshinst.exe. This is the SSH upgrade file for AccuTerm 97. Save it to the Spins users system in a temporary directory
Step 2. Run the file you just saved. The following screen should appear:
Step 3. Click next. The following screen should appear:
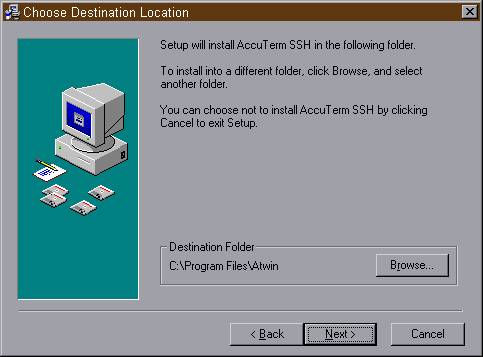
Step 4. Click next. The following screen should appear:
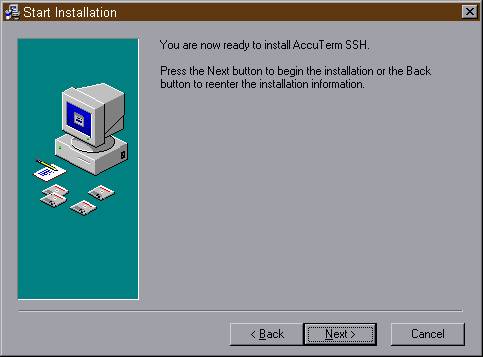
Step 5. Click next. The files will copy to the drive after which the following
screen will appear:
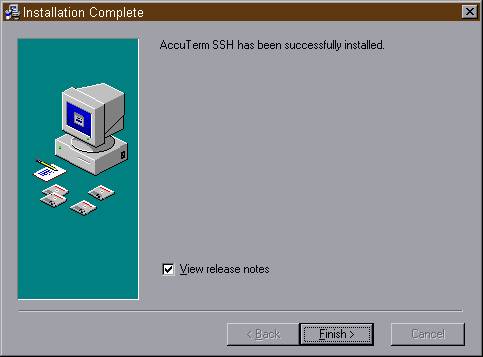
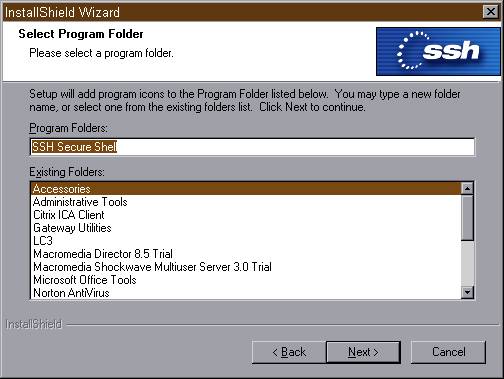
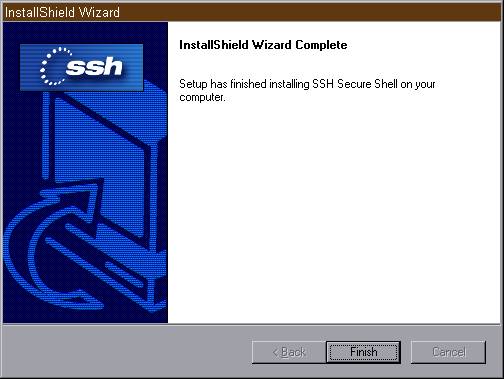
Step 6. Uncheck view release notes and click finish to exit the installer.
Phase II
Modify AccuTerm profile
Step 1. Go to Start >> Programs >> AccuTerm 97 the following screen should appear:

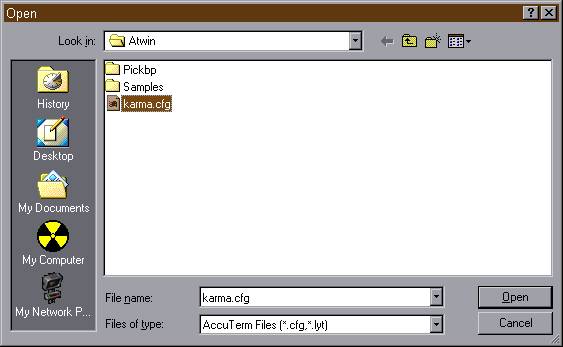
Step 2. Go to File >> Open in the menu and open the cfg file the user
uses to get into Spins. Should look something like the following:
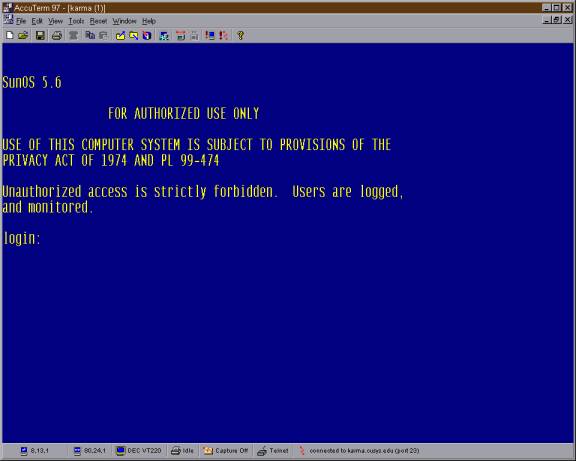
When you click on open it will connect to Spins and display login like below:
Step 3. Go to Tools >> Settings in the menu. The following tabbed
dialog should appear:
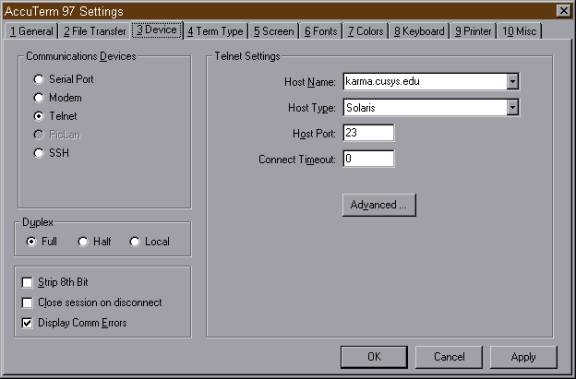
Step 4. On the device tab are the settings we need to change. It should
look something like the screen above with Telnet selected under Communication
Devices. And with Host Port set to 23 under Telnet Settings. You need to change
it to SSH under Communications Devices and change the Host Port to 22 under
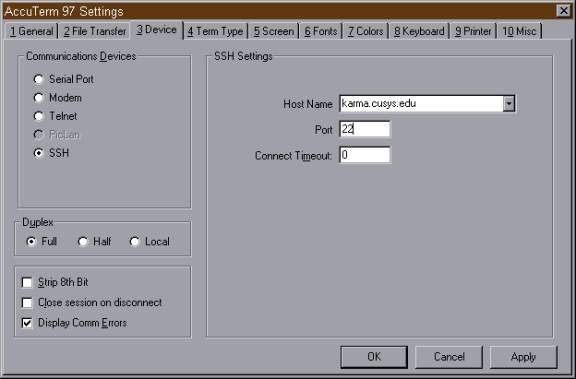
Telnet Settings. When your done it should look like the following if it does
hit ok.
Step 5. Go to File >> Save on the menu and save the cfg
file.
Step 6. Go to File >> Close on the menu and close the cfg file.
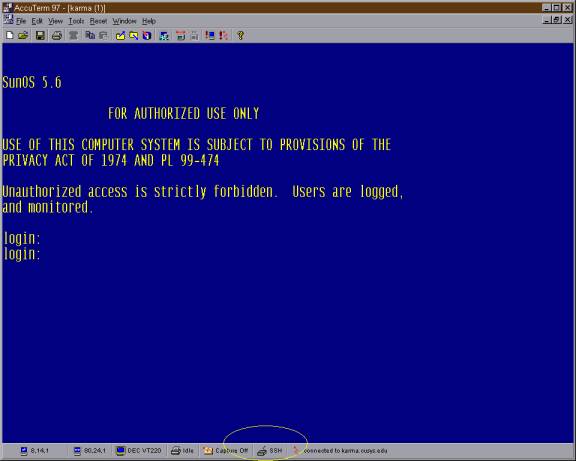
Step 7. Go to File >> Open and re open the cfg file it should connect to spins and display the login prompt as in the screen below. Check on the bottom status bar and ensure that it says SSH this is your verification that the cfg file is set up correctly.
Phase III
SSH/SFTP client install
Step 1. Click here to download the client. Save the file to a temporary directory.
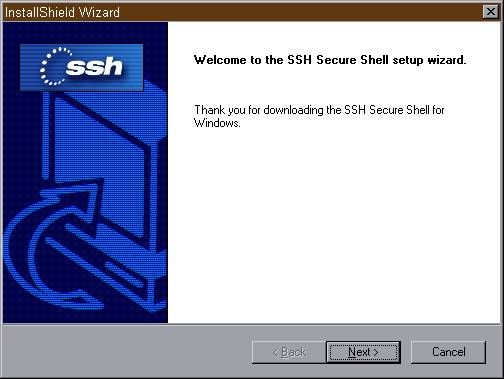
Step 2. Run the SSHWinClient.exe file you just saved. The following screen will appear:
Step 3. Click next the following screen will appear:
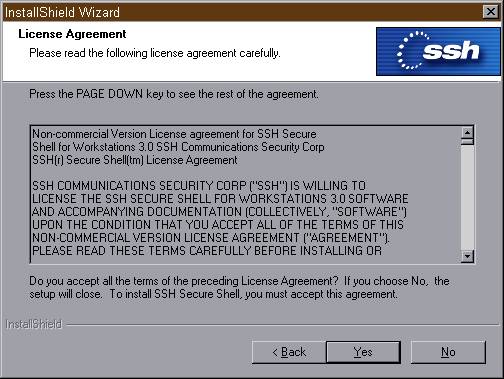
Step 4. Click Yes the following screen will appear:
Step 5. Click next the following screen will appear:
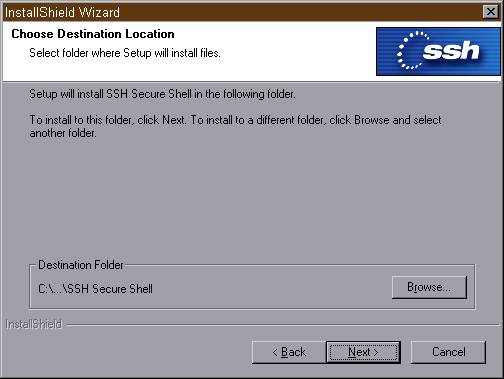
Step 6. Click next the following screen will appear:

Step 7. Click next the files will be installed and the following screen
will appear:
Step 8. Click finish to exit the installer.
Phase IV
Configure the SFTP connection for spins.
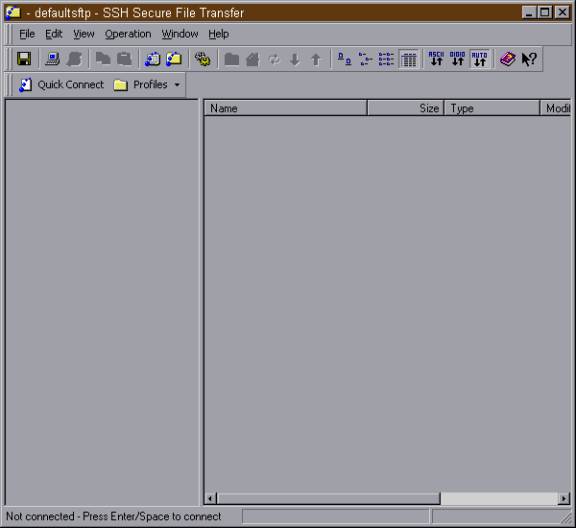
Step 1. Go to Start >> Programs >> SSH Secure Shell >> Secure File Transfer Client. This will start the SFTP client and display the following screen:
Step 2. Go to File >> Connect in the menu the following screen will
appear:
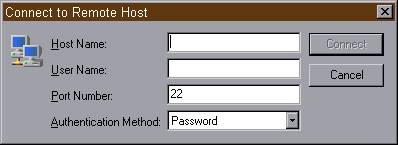
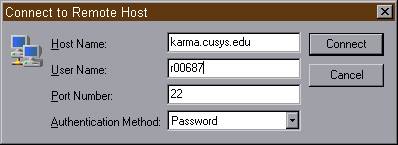
Step 3. Type in the following values in the above dialog
Host Name: karma.cusys.edu
User Name: the persons SPINS user id
The dialog should look something like the following:
Step 4. Click connect and the following screen will be displayed:
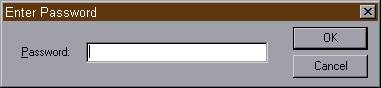
Step 5. Have the user enter the password for their SPINS account into above
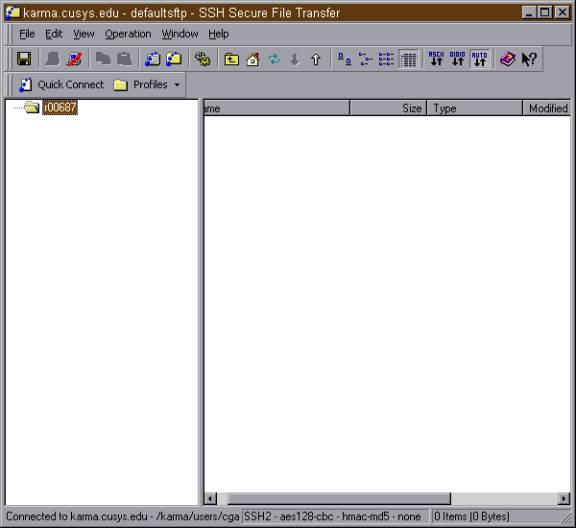
dialog. And click OK. You should see something like the following:
Step 6. Go to File >> Profiles >> Add Profile in the menu the
following dialog should be displayed:
![]()
Step 7. Type in a name to save this connection as a profile like the following.
And click Add Current Connection to Profiles.
![]()
Step 8. Go to Files >> Profiles and verify the profile you just added
is there.
Step 9. Explain to the user that they must now use the SFTP client and profile you just added. Eventually FTP will be turned off on the server so if they continue to use their FTP client eventually it will stop working.
Step 10. There is no step 10 that's all folks